How to Replace Hard Disk Drive and/or CD/DVD Rom Drive of HP Pavilion n5445 | Disassembly Guide
Unlike other laptops, HP Pavilion N5445 hard drive is located under the keyboard. So you will need to remove it first to be able to replace it. Here are the instructions to disassemble this HP Pavilion N5445 laptop:
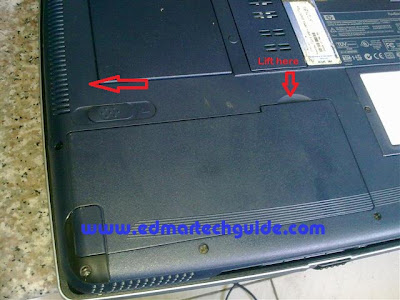
1. Unplug your laptop's AC adapted and remove the battery.

2. Remove the two (2) screws from the back panel located in the center of each hinge.

3. Open the LCD screen as far back at it goes. Use a small flat screwdriver to remove the top cover.


4. Unscrew the 4 screws that holds the keyboard and gently lift the keyboard.
 5. Now you should see the hardrive sitting in the center. Remove the screws (4 of them) on each corner of the hard drive which connect it to the motherboard.

6. Gently lift or pull the hard drive by using the black ribbon at the top of the hard disk drive.
 7. Once the hard drive is out, carefully remove the IDE connector that attached the hard disk drive to the motherboard.

8. Turn the hard drive upside down and remove the 4 screws which connect the hard disk to its carrier. You can now replace the hard drive with a new one. Remember that this laptop uses IDE type of hard disk drive, so be careful in finding a replacement. SATA drive will not fit/work in this one.

If you're replacing the CD/DVD Rom drive/writer, just remove the screw holding it in place and slide it all the way through. You will need to push the two clips at the top to be able to remove it.

1. Unplug your laptop's AC adapted and remove the battery.

2. Remove the two (2) screws from the back panel located in the center of each hinge.

3. Open the LCD screen as far back at it goes. Use a small flat screwdriver to remove the top cover.


4. Unscrew the 4 screws that holds the keyboard and gently lift the keyboard.
 5. Now you should see the hardrive sitting in the center. Remove the screws (4 of them) on each corner of the hard drive which connect it to the motherboard.
6. Gently lift or pull the hard drive by using the black ribbon at the top of the hard disk drive.
 7. Once the hard drive is out, carefully remove the IDE connector that attached the hard disk drive to the motherboard.
8. Turn the hard drive upside down and remove the 4 screws which connect the hard disk to its carrier. You can now replace the hard drive with a new one. Remember that this laptop uses IDE type of hard disk drive, so be careful in finding a replacement. SATA drive will not fit/work in this one.

If you're replacing the CD/DVD Rom drive/writer, just remove the screw holding it in place and slide it all the way through. You will need to push the two clips at the top to be able to remove it.


Comments