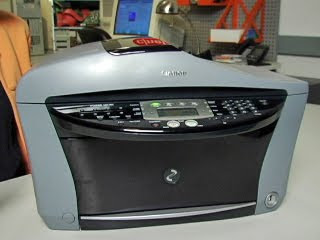
How To Repair Canon Pixma MP780 / MP760 / MP730 - Clogged Purge Unit

1) Open the cover to get at the ink tanks and when the carriage comes to the center pull the power plug on the printer, then move the printhead more to the left.
2) Have a syringe ready or an eye dropper with some Windex-Original with Amomnia D.
Use a flash light to see into the right side of the open area where you can reach the ink Caps. These are the small rectangular suction units where the printhead sets all the way to the right. When the carriage is Parked, these ink caps come up and cover the inkjet nozzles. There is one on the left for the black and one on the right for the color.
3) Add several drops of Windex to each cap until they appear flooded.
The windex should begin to absorb through the Caps and down through the purge tubes to the waste ink pads. If it all goes in, add a couple of more drops.
4) Plug the power back in and turn the printer on.
The carriage will move through a couple of cycles and you should hear the purge unit doing a couple of cycles. One is for the black ink and the other one is for all the other colors.
5) Close the cover and let the head do a parking cycle. This takes 55 seconds.
6) Once it is parked turn the printer off and then on again with the power button. The power on cycle will force the printer to do a purge cycle just to test the purge unit. This is all part of the Canon power on Diagnostic routine.
7) When it is finished and comes ready, raise the cover again and use your light to see if all the Windex is gone from the ink Caps. If you can reach the ink caps, add some more windex and repeat the cycle by closing the cover and cycling the power.
8) Keep doing this if the ink Caps appear to be getting cleaner. It could also break up any clog that might be there, but you may have to repeat the process several times.
If that doesn't clear up the problem, maybe the clog is not actually in the purge pump but rather in the tube coming from the bottom of the purge unit to the entrance of the peristaltic pump. You cannot unclog this tubing from the top of the purge unit. You will need to take apart the printer and get to the other end of the same tubing and squirt some Windex into it. The process for dismantiling the printer is the same as for changing the waste ink absorber pads.


Comments
Tried multiple cleaning/deep cleaning, alignments, yet another 3e cart, etc. ... nothing.
I was pessimistic as to this working, but it worked like a charm after a single attempt.
One thing I noticed was there were two little porous pads sitting on top of those ink drains. I eventually pulled them out, cleaned with the same solution and reinstalled.
Plugged in the unit and waited for start up and viola: black printing again.
I just finished using this same procedure on a Canon Pixma 3000. Worked just fine!
Thanks.
I didn't have a syringe, but found an empty eye dropper bottle and used that to drop Windex into the Purge unit. Took me about 8 rounds of soaking the pads, then did a deep clean and all was good in the world!
Thank you again! FYI I did this on the MP560.